SCANROK installation system | KEFSVLK-10
Set of energy saving facade ventilated system with stone (tile) | modification 10.
Purpose of the SKANROK KEFSVLK-10 installation system:
Installation of the ventilated SKANROK KEFSVLK-10 ventilated facade is carried out on walls made of low density cellular concrete (D <600).
Fastening of the SKANROK KEFSVLK-10 system is carried out directly in interfloor floors.


The SKANROK KEFSVLK-10 system is a patented system.
The SCANROK KEFSVLK-10 system, like all other SKANROK systems, is highly reliable and durable.
All SKANROK ventilated facade systems have been certified in Ukraine, Western Europe and other countries.
SKANROK ventilated facades are exported to Belarus, Kazakhstan, Scandinavia, Baltic countries, Czech Republic, Slovakia, Germany, Denmark, Holland and even Australia.
General view of the SKANROK KEFSVLK-10 system
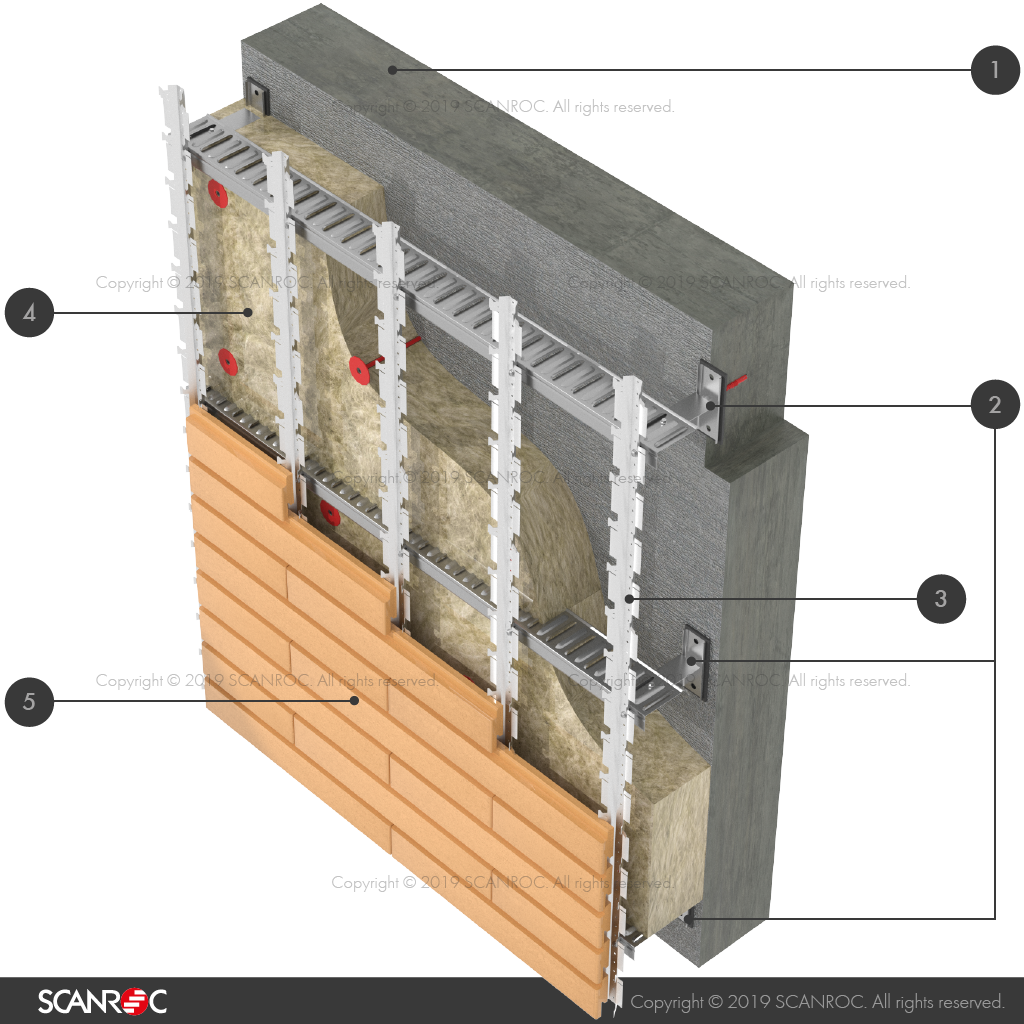
All SCANROC KEFSVLK systems consist of three groups:
- structural metal part;
- heater;
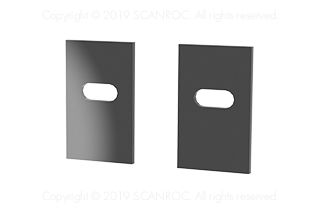
- front [SKANROK facade tile].
Explanation of the scheme:
- Blocks of cellular concrete, such as gas blocks.
- Reinforced concrete floors.
- Mounting points [the whole system is fixed exclusively in reinforced concrete flooring].
- Heater.
- Structural metal part.
- Facade tile SKANROK.
Note: the red plane in the figure indicates a conditional section of the wall.
The structure of the structural metal part of the SCANROK KEFSVLK-10 system

All metal parts of the system are made of high quality European hot-dip galvanized steel.
All screws and anchor bolts are hot-dip galvanized.
Explanation of the scheme:
- Blocks of cellular concrete.
- Reinforced concrete floors.
- Anchor bolt 10×100.
- Termoizolyatsіyna laying SCANROK T-3.
- Nut.
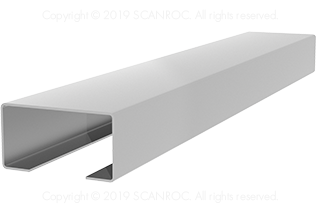
- Console SCANROK K-180.
- Hot dip galvanized screws 6,3х19.
- SKANROK P-1 slider.
- Hot dip galvanized screws 6,3×19.
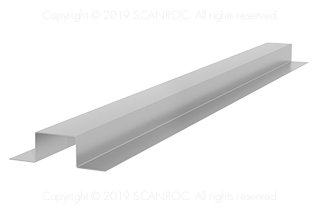
- Rack SKANROK C-100.
- Crossbar SCANROK R-6.
- Rack SKANROK C-1.
- Hot dip galvanized screws 4,8×13.
The SKANROK C-1 is directly attached to the SKANROK tile.
The diagram shows the placement of SKANROK C-1 racks in 600 mm increments for LONG Format [600 × 100 mm] and LARGE Format [600×200 mm] tiles. To hang the tile cottage format COTTAGE Format [300×100 mm] the number of racks SKANROK C-1 is doubled in increments of 300 mm.
Accessories SKANROK KEFSVLK-10 systems
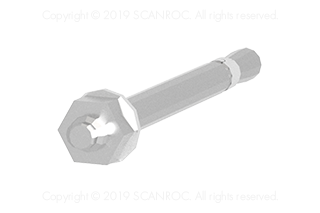
Anchor bolt 10x100
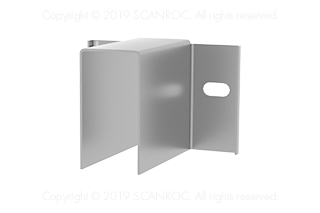
Console SCANROK K-180
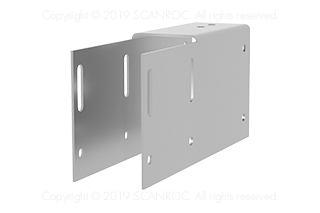
SKANROK P-1 slider
Crossbar SCANROK R-6
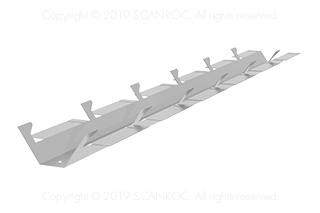
Rack SKANROK C-1
Rack SKANROK C-100
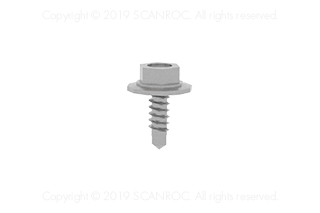
The self-tapping screw is hot-galvanized 4,8х13
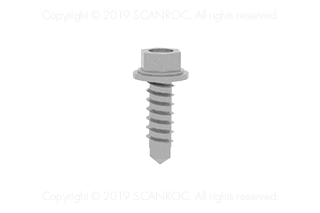
The self-tapping screw is hot-dip galvanized 6,3х19
Laying SCANROK T-3
Installation stages of the SKANROK KEFSVLK-10 system
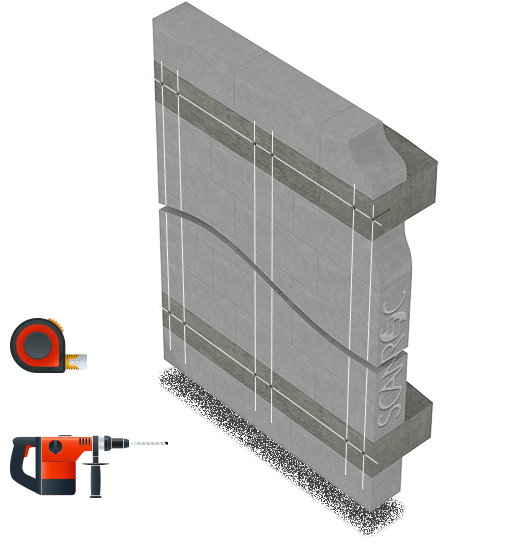
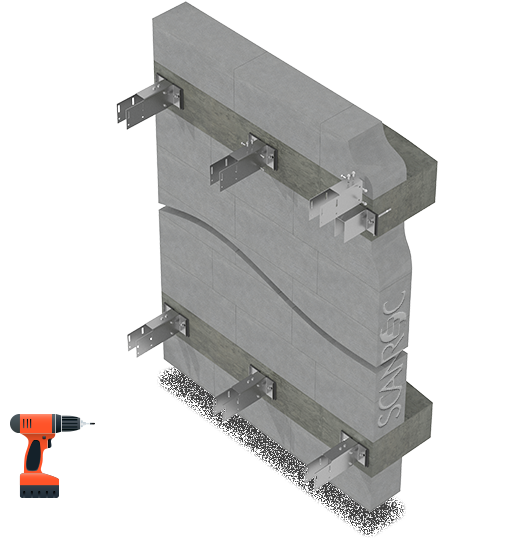
Step 1. Marking and drilling of holes
Perform markup according to the project. Drill holes to install anchor bolts.
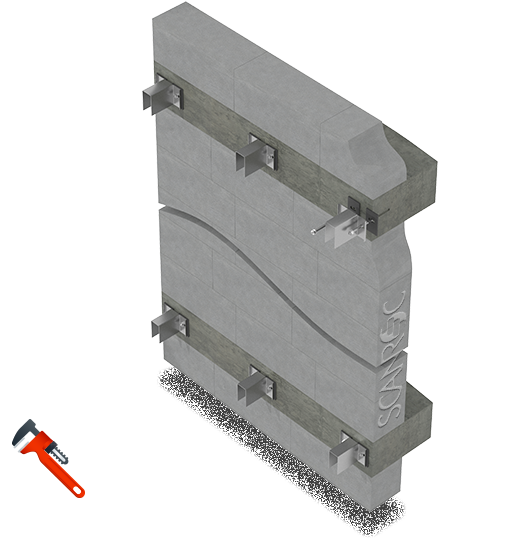
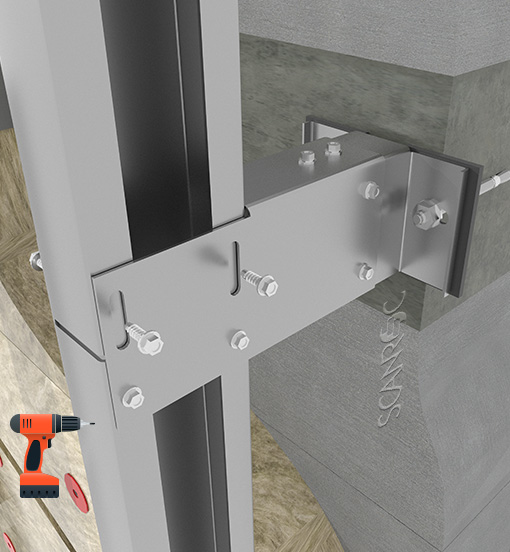
Step 2. Installation of SKANROK K-180 consoles
With the help of 10×100 anchor bolts, screw the consoles to the reinforced concrete interfloor floors, pre-installing the T-3 insulation linings one pair under each console.
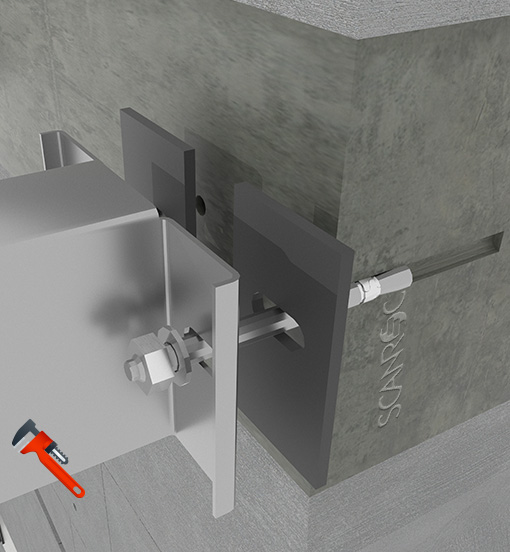
Mounting point of the SKANROK K-180 console to the reinforced concrete interfloor floor. The brackets are secured with two anchor bolts for each mounting point.
After mounting the consoles, be sure to check the tightening of the nuts.
Step 3. Installation of the SKANROK P-1 sliders
The SKANROK P-1 slider connects the SKANROK C-100 rack and the SKANROK K-180 console. With the help of the slider, the flight length of the C-100 rack is regulated. Mounting of the slider P-1 to the console K-180 is performed with the help of hot-dip galvanized screws 6,3×19 (6 pcs for each attachment point).
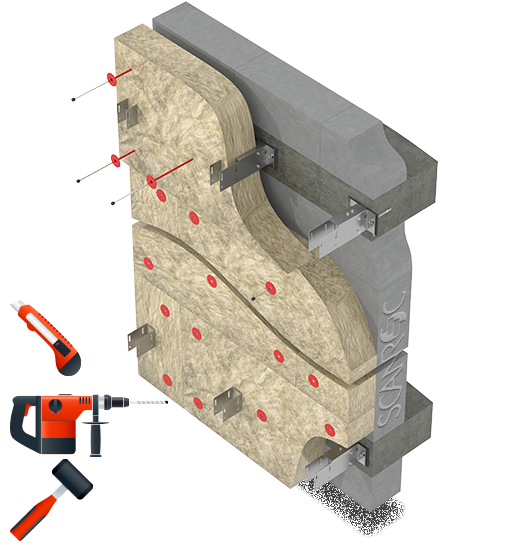
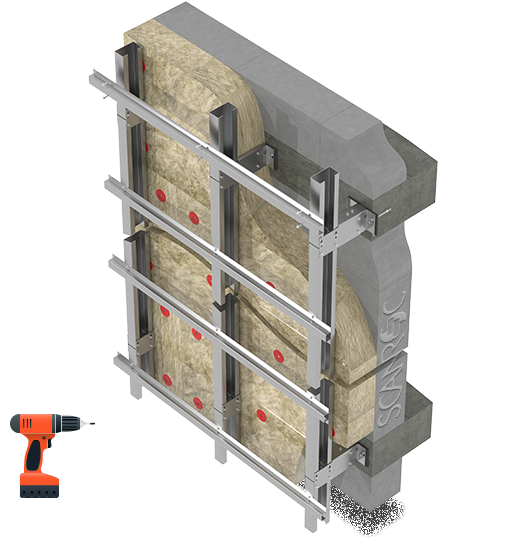
Step 4. Installation of thermal insulation
Before installing the insulation mats, it is necessary to cut through the holes through the knife for the projecting elements of the consoles. After the mats are hung, the holes in the wall (everywhere the mats) are drilled, and umbrella dowels are used to hold the mats. Technology of fastening of thermal insulation is carried out in accordance with building codes.
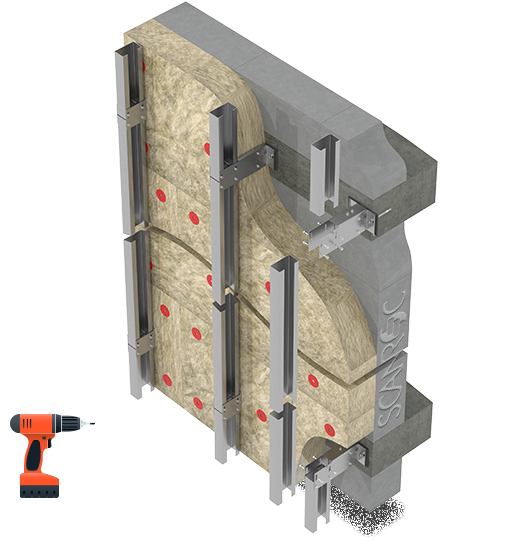
Step 5. Installation of the SKANROK C-100 rack
The SKANROK C-100 rack transfers the load from the SKANROK decorative-protective part to the wall and attaches directly to the SKANROK P-1 slider with the help of 6.3×19 hot-dip galvanized screws (8 pieces for each attachment point).
Importantly! The heater should not touch the SKANROK C-100 rack. Maintain the required clearance according to the project.
General view of the power unit for fastening the SCANROK system to the concrete floor.
Vertical stand SKANROK C-100 is cut in factory length according to the project (inter-storey distance). This greatly speeds up the installation process and provides the required quality of the structural system.
Connection of the SKANROK C-100 racks is vertically jointed at the joints of the P-1 slider.
Step 6. Installation of crossbars SKANROK R-6
The function of the SKANROK P-6 crossbars is to build a foundation for the placement of the vertical SKANROK C-1 racks, onto which the SKANROK facade tiles are directly hung.
Crossbars SKANROK R-6 join the racks SKANROK C-100 with the help of hot-dip galvanized screws 6,3×19 (2 pieces for each mounting point).
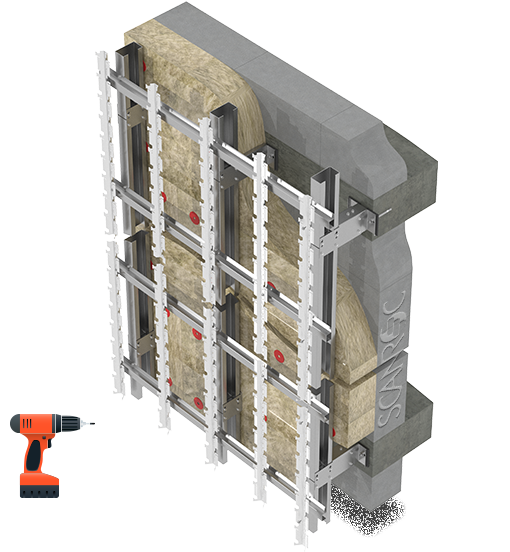
Step 7. Installation of SKANROK C-1 racks
SKANROK C-1 racks function as holders of SKANROK facade tiles. The SKANROK C-1 rack is fastened directly to the SKANROK R-6 crossbar with the help of 4.8×13 hot-dip galvanized screws (1 pc for each mounting point).
Depending on the length of the facade tiles, SKANROK C-1 racks are placed in 600 mm increments (for LONG 600 × 100 and LARGE 600 × 200 tile formats) or 300 mm (for COTTAGE 300×100 tile format). SKANROK C-1.75 joints are placed depending on other formats of SKANROK clinker tiles.
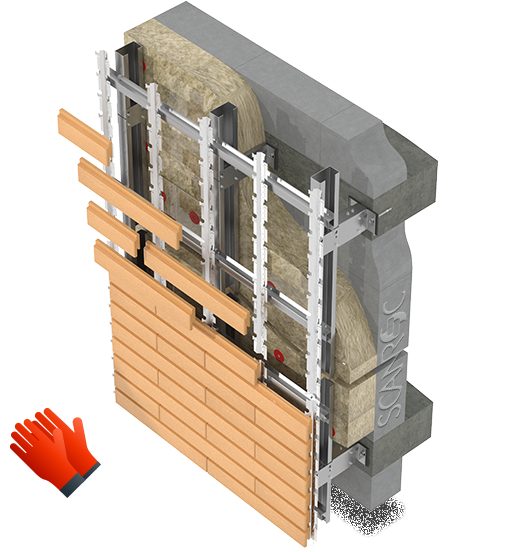
Step 8. Mounting of facade tiles SCANROK
After mounting the entire system on the protruding antennae of the SKANROK C-1 racks, the SKANROK tiles are hung.
The attachment is done by pressing on the tile and planting its groove on the antennae of the stand C-1.
Each tile should have 3 points of resistance – left, right edge and middle. At a minimum, every fifth row must be secured with additional anti-vandal antennae having SCANROC C-1 counters unless otherwise provided by the project.

Kiev, 02000, Ukraine


