SCANROK installation system | KEFSVLK-2
Set of energy saving facade ventilated system with stone (tile) | modification 2.
Purpose of the SKANROK KEFSVLK-2 installation system:
Installation of the ventilated SKANROK KEFSVLK-2 ventilated facade is performed on all types of walls, except for walls made of low density cellular concrete(D<600).
Fastening of the SKANROK KEFSVLK-2 system is carried out on the whole surface of the wall.


The SKANROK KEFSVLK-2 system is a patented system.
The SKANROK KEFSVLK-2 system, like all other SKANROK systems, is highly reliable and durable.
All SKANROK ventilated facade systems have been certified in Ukraine, Western Europe and other countries.
SKANROK ventilated facades are exported to Belarus, Kazakhstan, Scandinavia, Baltic countries, Czech Republic, Slovakia, Germany, Denmark, Holland and even Australia.
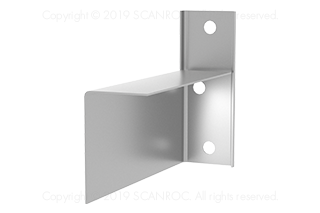
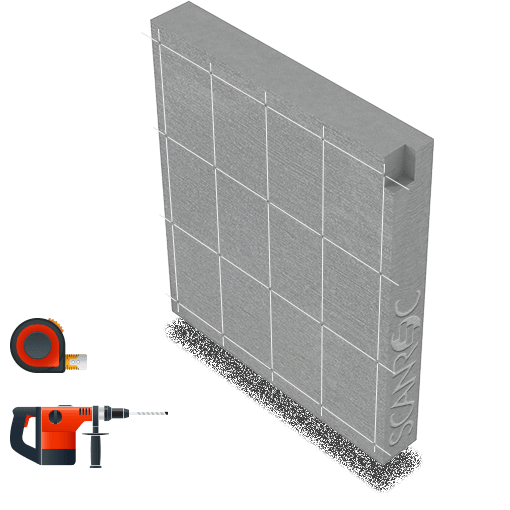
General view of the SKANROK KEFSVLK-2 system
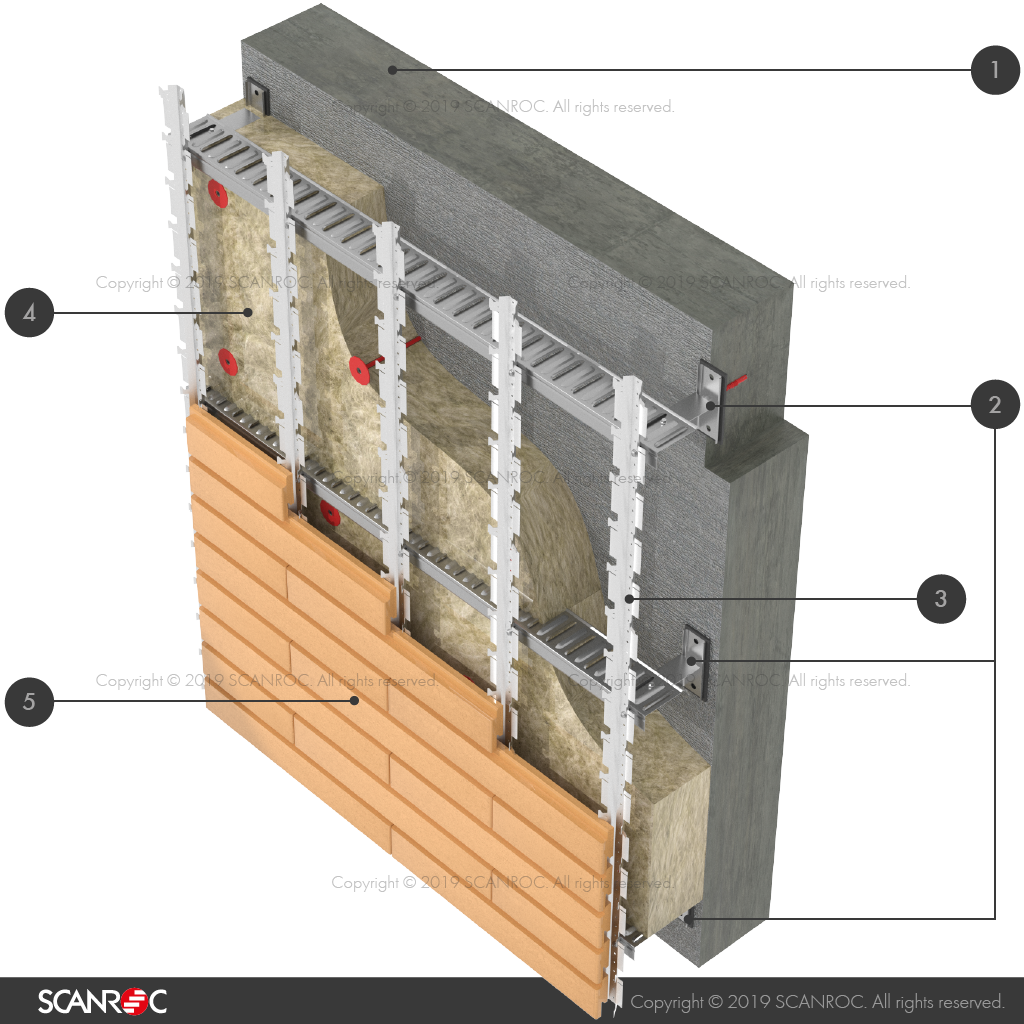
All SCANROC KEFSVLK systems consist of three groups:
- structural metal part;
- heater;
- front [SKANROK facade tile].
Explanation of the scheme:
- Wall (for example, ceramic or silicate brick, ceramic stones, reinforced concrete, cellular high-density concrete blocks D≥600).
- Mounting points.
- Structural metal part.
- Heater.
- Facade tile SKANROK.
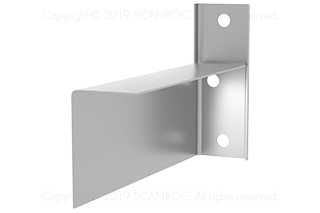
The structure of the structural metal part of the SKANROK KEFSVLK-2 system

All metal parts of the system are made of high quality European hot-dip galvanized steel.
All screws and anchor bolts are hot-dip galvanized.
Explanation of the scheme:
- Wall.
- Anchor dowel.
- Screw anchor.
- Termoizolyatsіyna laying SCANROK T-1.
- Console SCANROK K-1.1 ABO K-1.2, K-1.3, K-1.4.
- Hot dip galvanized screws 6,3х19.
- Hot dip galvanized screws 4,8х13.
- Rigel SCANROOK Р-1.1.
- Rack SCANROK С-1.
The SKANROK C-1 is directly attached to the SKANROK tile.
The diagram shows the placement of SKANROK C-1 racks in 600 mm increments for LONG Format [600 × 100 mm] and LARGE Format [600×200 mm] tiles. To hang the tiles of the cottage format COTTAGE Format [300×100 mm] the number of racks SKANROK C-1 is doubled in increments of 300 mm.
Accessories SKANROK KEFSVLK-2 systems

Anchor with hot-dip galvanized screw 10x80 for concrete (HRV type)
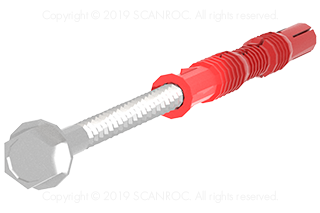
Anchor with hot-dip galvanized 10x100 screw for solid brick (HRV type) for hollow brick and high density concrete D≥600 (HRD type)
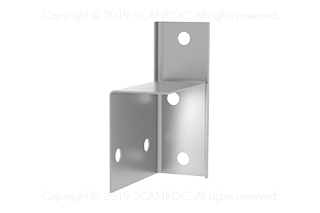
SKANROK K-1.1 Console | L = 102 mm under insulation 50… 100 mm thick
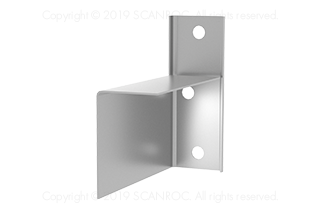
SKANROK K-1.2 Console | L = 152 mm under insulation up to 150 mm thick
SKANROK K-1.3 Console | L = 190 mm under insulation up to 200 mm thick
SKANROK K-1.4 Console | L = 230 mm under insulation up to 230 mm thick
Rigel SCANROK P-1.1 | L = 3 600 mm
Rack SKANROK C-1 | L = 3000 mm tile step = 100 mm

Rack SKANROK C-1.75 | L = 3000 mm tile step = 75 mm
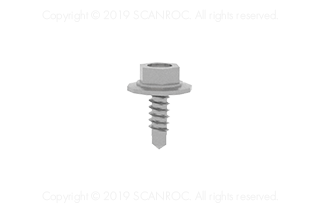
The self-tapping screw is hot-dip galvanized 6,3х19
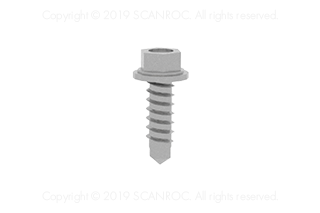
The self-tapping screw is hot-galvanized 4,8х13
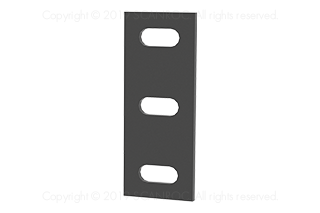
Termoizolyatsіyna laying SCANROK T-1
Installation stages of the SKANROK KEFSVLK-2 system
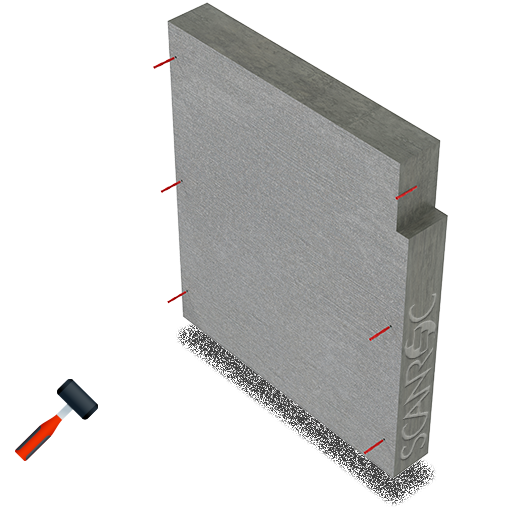
Step 1. Marking and drilling of holes
Perform markup according to the project. Drill holes to install anchor bolts.
Step 2. Installation of dowels
Insert dowels into the prepared holes
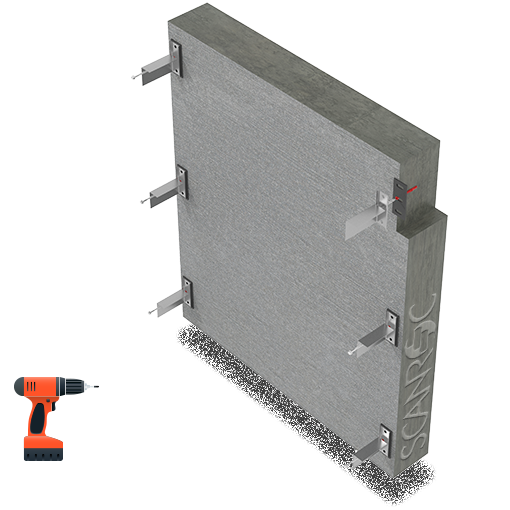
Step 3. Installation of SKANROK K-1.X consoles
Attach the consoles to the wall with the help of anchor screws by pre-installing the T-1 thermal insulation one piece under each console.
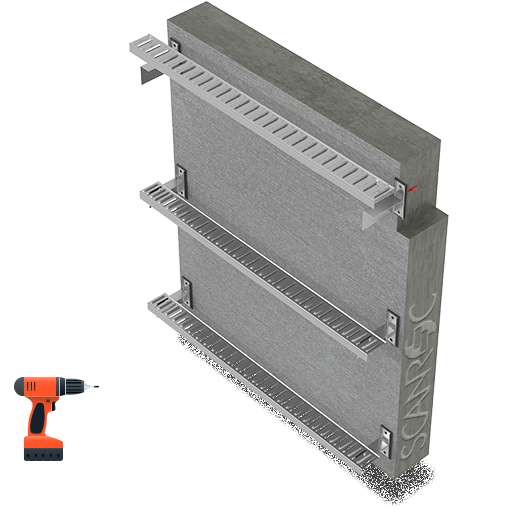
Step 4. Installation of crossbars SCANROC P-1.1
Crossbars SKANROK P-1.1 form the basis for the placement of vertical racks SKANROK C-1 or C-1.75, which are directly hung tiles SKANROK.
Fastening of crossbars SKANROK P-1.1 to consoles SKANROK K-1.X is made with the help of hot-dip galvanized screws 6,3×19 (1-2 pieces for each attachment point).
Crossbars are joined together along the lintel wall.
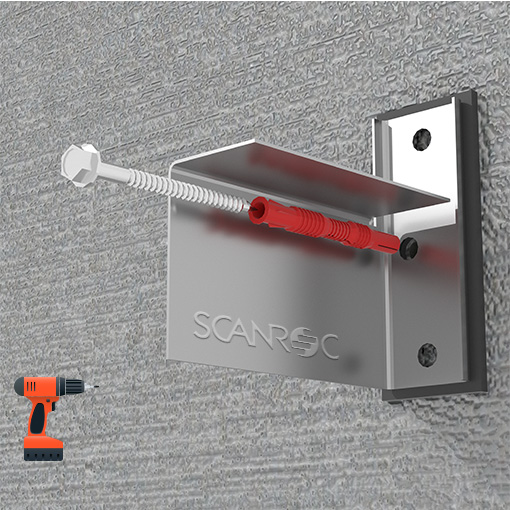
General view of the point of attachment of the SCANROC system to the wall.
The console is attached to the middle hole.
After mounting the consoles, be sure to check the tightening of the anchors
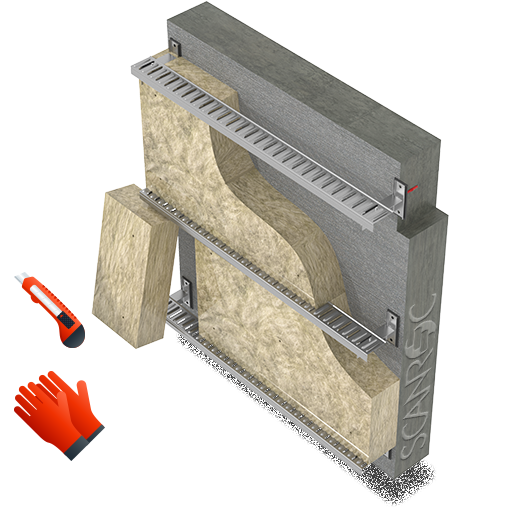
Step 5. Installation of thermal insulation
Before installing the insulation mats, it is necessary to cut through the holes through the knife for the projecting elements of the consoles. After the mats are hung, the holes in the wall (everywhere the mat) are drilled.
Technology of fastening of thermal insulation is carried out in accordance with building codes.
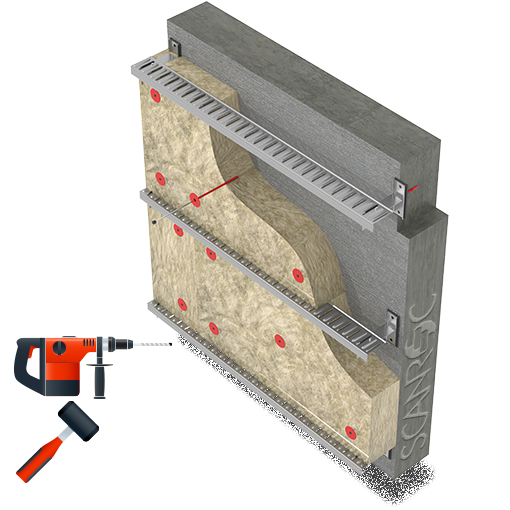
Step 6. Fastening of thermal insulation
Install the umbrella anchors into the holes and secure them with the studs included with the umbrella anchor.
Technology of fastening of thermal insulation is carried out in accordance with building codes.
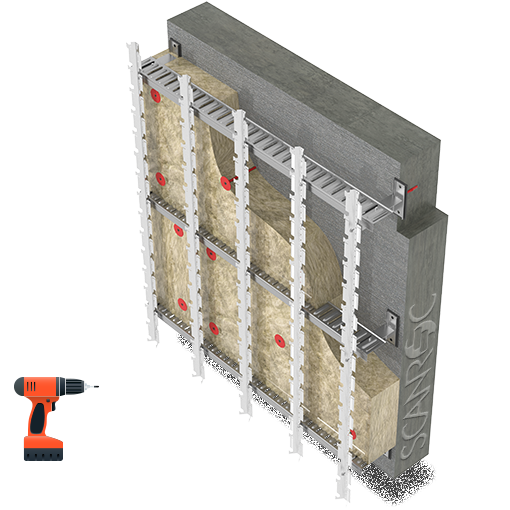
Step 7. Installation of Rack SKANROK C-1 (C-1.75)
SKANROK C-1 (C-1.75) racks act as SCANROK tile holders. The SKANROK C-1 rack is fastened directly to the SKANROK P-1.1 crossbar with the help of 4.8×13 hot-dip galvanized screws (1 pc for each mounting point).
Depending on the length of the tile, the SKANROK C-1 racks are placed in increments of 600 mm (for LONG 600 × 100 and LARGE 600 × 200) or 300 mm (for COTTAGE 300×100). SKANROK C-1.75 racks are placed depending on other formats of SKANROK clinker tiles.
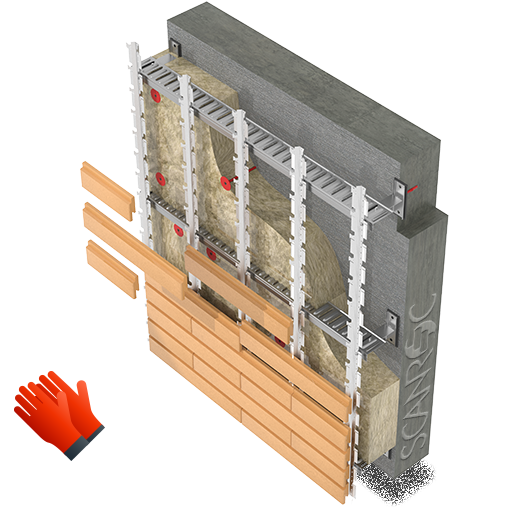
Step 8. Mounting of facade tiles SCANROK
After mounting the entire system on the protruding antennae of the SKANROK C-1 racks, the SKANROK tiles are hung.
The attachment is done by pressing on the tile and planting its groove on the antennae of the stand C-1.
Each tile should have 3 points of resistance – left, right edge and middle. At a minimum, every fifth row must be secured with additional anti-vandal antennae having SCANROC C-1 counters unless otherwise provided by the project.

Kiev, 02000, Ukraine


